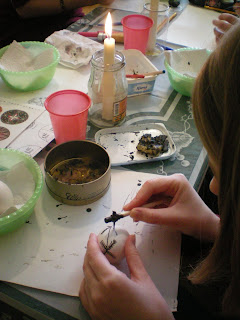
1. Take a white egg. Make sure that it is solid and has no cracks and is not weak.

2. Looking at a design or making your own design, draw litely on the egg with pencil. I used a design ready made--which is actually easier than making your own on your first try. I liked the traditional look. I picked something that wasn't too hard, but not too easy. I liked a bit of a challenge. Then you take bee's wax and scoop it into the wide end of this little tool. You get the tool hot in the fire and it melts the wax making it come out the tiny end of the tool. You apply this to part of your design, but not all of it.

3. You put it in the first color of dye. I used Yellow. This means that everything under the wax would be white. It's white because under the wax is the color of the egg.

4. Then apply more wax to the design. This then means that whatever wax you put on at this stage will keep that part of the design yellow. Then set it in more dye. I used orange dye at this stage.

5. Do the process one more time and then set it in the last color of dye--red.

Here are some of the other girls working on their eggs.

6. Now mine is still not finished. I need to remove the black wax. For a short period of time, hold the egg right next to the candle flame. Hold it only until you see the black wax starting to melt and get close to dripping. If you hold it too long, it will scorch the egg. When the wax starts to melt, take a paper towel and wipe the wax off. Continue until all the wax is off.

7. Now we have to get the yolk outside of the egg. Nadja has special tools for this so that you don't have to blow it out and get dye all over your lips. You poke a small hole in the top of the egg with the tool. Then you turn it over and squeeze the tool. It is a suction action and makes all the egg come out from inside.

8. And wa-la! We are done! Final project! I think this looks pretty good for being my first egg ever.


Here is a final look at some of the other eggs done that day.


That's so beautiful!
ReplyDeleteThat is super cool!
ReplyDelete